Why You Should Disable Startup Programs in Windows 11
When you power on your Windows PC, several apps and services are set to launch automatically in the background. While some of these are essential, others may slow down your system’s performance and increase boot time. If you’ve noticed your computer taking longer than usual to start, it’s probably time to disable startup programs in Windows 11.
Startup programs can be anything from messaging apps and cloud storage clients to driver tools and update managers. These applications run silently in the background and consume valuable system resources like memory and CPU power. Over time, as more apps get added to the startup list, your system can become sluggish.
Table of Contents
- Why You Should Disable Startup Programs in Windows 11
- How Disabling Startup Apps Can Improve Windows 11 Performance
- What Is the Startup Folder?
- Final Checklist + Frequently Asked Questions
What Are Startup Apps?
Startup apps are programs that are configured to run automatically as soon as Windows boots. Some are necessary—like antivirus software—but others, like music players or chat apps, don’t need to run until you open them manually. Knowing how to manage startup apps in Windows 11 can make a big difference in your device’s responsiveness.
Thankfully, Windows 11 makes it easier than ever to view and manage these applications. With a few quick adjustments, you can turn off startup apps in Windows 11 and improve overall system performance.
Why Reducing Startup Load Matters
There are several benefits to reducing the number of apps that launch at startup:
- Faster boot times: Your PC loads quicker when fewer apps launch at startup.
- Improved performance: Freeing up RAM and CPU helps your system run smoother.
- Better battery life: On laptops, fewer background apps can reduce power consumption.
- Fewer distractions: You only see the apps you intentionally launch, not ones auto-loading without consent.
In the sections that follow, we’ll show you how to identify which apps are set to launch at startup and walk you through the exact steps to disable or manage them, whether you prefer using Task Manager, Settings, or other built-in tools.
How to Disable Startup Programs in Windows 11 Using Task Manager
One of the easiest ways to disable startup programs in Windows 11 is through the Task Manager. This tool gives you full control over which applications are allowed to run when your system boots. It’s also a great way to monitor the impact of each app on startup performance.
Step-by-Step Instructions
- Step 1: Right-click the Start button (or press
Ctrl + Shift + Esc) and select Task Manager. - Step 2: In Task Manager, click on the Startup apps tab from the sidebar. If you don’t see tabs, click More details first.
- Step 3: You’ll see a list of programs set to launch on startup, along with their status and “Startup impact.”
- Step 4: To stop apps from opening on startup in Windows 11, right-click any listed item and choose Disable.
Each disabled item will remain installed on your system but will no longer start automatically when you log in. You can re-enable any app later by repeating the steps above and selecting Enable.
Tips for Choosing Which Apps to Disable
- Disable: Cloud services, music players, game launchers, messaging apps, and third-party updaters you don’t need immediately at startup.
- Keep Enabled: Security software (like antivirus), drivers, system monitoring tools, and apps essential to your workflow.
If you’re not sure about a specific app, a quick Google search of its name will usually tell you what it does and whether it’s safe to disable. Being selective is key to learning how to manage startup apps in Windows 11 without accidentally stopping something important.
Now that you know how to manage startup apps using Task Manager, let’s explore another way to do it using Windows Settings — especially useful if you prefer a more visual interface.
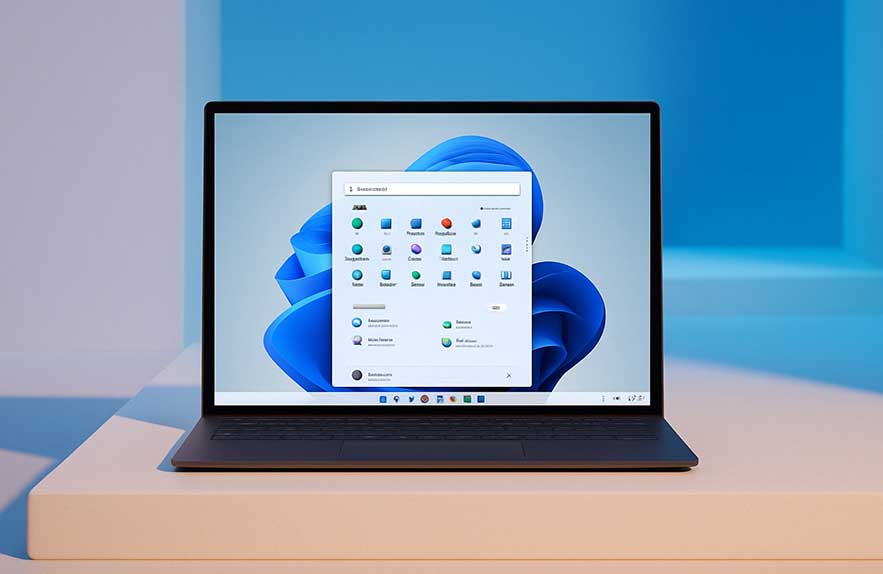
Disable Startup Programs via Windows 11 Settings
If Task Manager feels a bit too technical, you can disable startup apps in Windows 11 using the built-in Settings app. This is an easy and clean interface that lets you control what runs automatically each time your PC starts.
Follow These Steps
- Step 1: Open the Start Menu and click Settings (or press
Windows + I). - Step 2: In the left sidebar, select Apps.
- Step 3: Click Startup from the right pane.
- Step 4: You’ll see a list of apps with toggle switches next to them.
- Step 5: To stop apps from running on startup in Windows 11, turn the toggle off for any app you don’t want to launch automatically.
This method is great for visually managing which apps are allowed to run in the background when your PC starts up. You’ll also see the “Startup impact” rating here, so you can make informed decisions when managing startup programs in Windows 11.
Which Apps Should You Turn Off?
As a general rule, if an app doesn’t need to run immediately when your system boots, you can disable it. For example:
- Turn off music streaming apps like Spotify or iTunes.
- Disable messaging services like Skype, Discord, or Zoom if you don’t use them on startup.
- Pause unnecessary third-party launchers or update agents that slow your boot time.
However, avoid disabling anything you don’t recognize without first researching what it does. If in doubt, it’s safer to leave it enabled or ask an expert.
Once you’re finished, you can simply close the Settings window. Your changes are saved automatically, and the selected apps will no longer run when you power on your device.
In the next section, we’ll look at the impact disabling startup programs can have on system performance, especially for older PCs or laptops that boot slowly.
How Disabling Startup Apps Can Improve Windows 11 Performance
Wondering if it’s worth the effort to turn off startup apps in Windows 11? The answer is yes — especially if your computer takes forever to boot. Disabling unnecessary startup programs is one of the easiest ways to speed up your system without installing anything or spending money.
Startup Programs Consume Resources
Each time Windows 11 starts, every enabled startup app loads into memory and uses CPU power. Even apps that just sit quietly in the system tray are consuming resources. This adds up — especially if you have a lot of software that launches by default.
Common culprits include:
- Cloud syncing tools (e.g., Dropbox, OneDrive)
- Chat and meeting software (e.g., Teams, Slack, Zoom)
- Auto updaters (e.g., Adobe, Java, browser helpers)
- Game launchers (e.g., Steam, Epic Games Launcher)
Benefits of Disabling Startup Apps
- Faster boot time: Your system reaches the desktop quicker, ready to use.
- Better performance: More memory and CPU are available for the apps you actually want to use.
- Less background clutter: Fewer processes running means a cleaner, more efficient OS.
- Longer battery life (laptops): Reducing startup apps lowers background activity and extends battery performance.
This is especially important for older machines or budget laptops with limited RAM and slow storage. If your PC takes more than a minute to fully boot and settle down, trimming your startup list will likely make a noticeable difference.
Pro Tip: Restart After Making Changes
Once you manage startup apps in Windows 11 and disable what you don’t need, restart your computer. This allows you to measure how much faster it boots. You can always go back and re-enable apps if needed.
In the next section, we’ll show you how to go even deeper — using the legacy shell:startup command to manually check and remove hidden startup entries.
Advanced Option: Using the Windows 11 Startup Folder
If you want full control over what launches with Windows — or if you’re troubleshooting stubborn apps that still open on boot — it’s time to go beyond the Settings app and Task Manager. Windows still supports an old-school method: the Startup Folder.
We’ve written an entire guide on how to access and use the Windows Startup Folder — but here’s a quick overview for power users.
What Is the Startup Folder?
It’s a special system folder that runs shortcuts placed inside it when the system boots. You can add or remove apps manually here, giving you precise control over startup behavior — especially useful for older programs or custom scripts.
How to Open It
- Press
Windows + Rto open the Run dialog. - Type
shell:startupand hit Enter.
This opens the current user’s startup folder. If you want to apply changes for all users, type shell:common startup instead.
To Stop a Program from Starting
- If you see a shortcut to a program you no longer want to auto-launch, right-click and delete it.
- There’s no harm — it doesn’t remove the app from your system, just from startup.
Some programs add themselves here even after you disable them in Settings or Task Manager. This is a great fallback to check if something keeps coming back.
For a more detailed explanation and troubleshooting tips, check out this external article on TechRepublic’s guide to disabling startup apps in Windows 11.
Now that you’ve seen all the main ways to disable startup programs in Windows 11, let’s wrap things up with a final checklist and some frequently asked questions.
Final Checklist + Frequently Asked Questions
If you’ve followed the steps in this guide, you’ve already improved your boot time and freed up system resources. But just to make sure you’ve covered everything, here’s a quick checklist and some answers to common questions about managing startup programs in Windows 11.
Quick Checklist: Managing Startup Apps in Windows 11
- ✅ Opened Task Manager and reviewed all startup apps
- ✅ Disabled unnecessary apps with a high impact on boot time
- ✅ Used Windows Settings to review startup permissions
- ✅ Checked the
shell:startupfolder for hidden entries - ✅ Restarted the system to test performance improvements
Frequently Asked Questions
Q: Will disabling startup apps affect updates?
A: No. Disabling startup entries doesn’t stop the app from working — it just prevents it from launching automatically. You can still run it manually and receive updates.
Q: Is it safe to disable everything?
A: Almost. Avoid disabling apps related to your antivirus, graphics drivers, or essential system utilities. When unsure, search the app name online or keep it enabled.
Q: Why do some apps reappear after I disable them?
A: Some programs are aggressive and re-enable startup entries after updates. In that case, check the app’s own settings or remove the shortcut from the shell:startup folder.
Q: Can I use third-party tools to manage startup programs?
A: Yes. Apps like Autoruns by Sysinternals offer a deeper view into startup behavior — but they’re best for advanced users. For most people, Windows’ built-in tools are more than enough.
Wrap-Up
Learning how to manage startup apps in Windows 11 is one of the easiest and most effective ways to improve your PC’s speed and responsiveness. Whether you’re using the built-in Settings, Task Manager, or going deeper with the shell:startup command, the key is consistency. Check your startup apps every few months — especially after installing new software — and keep things clean.
Now that you’ve taken control of your system’s startup, you’ll enjoy quicker boot times and smoother performance every day.
Have another performance tip or question about startup programs? Drop it in the comments or reach out — we’re always here to help!