Why Screen Recording on iPhone Matters (And What It Does)
Whether you’re making a tutorial, saving a video call, or recording gameplay, learning how to screen record on iPhone opens up a ton of possibilities. It’s one of the most useful built-in tools in iOS — and surprisingly, many people don’t know it’s there or how to use it properly.
Unlike taking a screenshot, screen recording captures everything happening on your iPhone in real time. That includes swipes, taps, notifications, and even audio if you enable the microphone. If you’ve ever Googled how to record screen on iPhone, you’re not alone — the feature is powerful, but Apple doesn’t exactly put it front and center.
This guide will walk you through exactly how it works — from adding the control to your Control Center, to customizing audio options, and saving your recordings for sharing. We’ll also cover variations like how to screen record on iPhone 15, what to do if it’s not working, and tips for making your recordings cleaner and clearer.
Whether you’re using an iPhone 8 or the latest iPhone 15 Pro, the screen recording process is simple once you know where to look. Let’s get started by setting it up.
Table of Contents
- Why Screen Recording on iPhone Matters (And What It Does)
- How to Add Screen Record on iPhone (Control Center Setup)
- How to Screen Record on iPhone (Step-by-Step)
- Tips to Improve Your iPhone Screen Recordings
- Where to Find and Share Your iPhone Screen Recordings
- What You Can Do With iPhone Screen Recordings
- Frequently Asked Questions (FAQ)
How to Add Screen Record on iPhone (Control Center Setup)
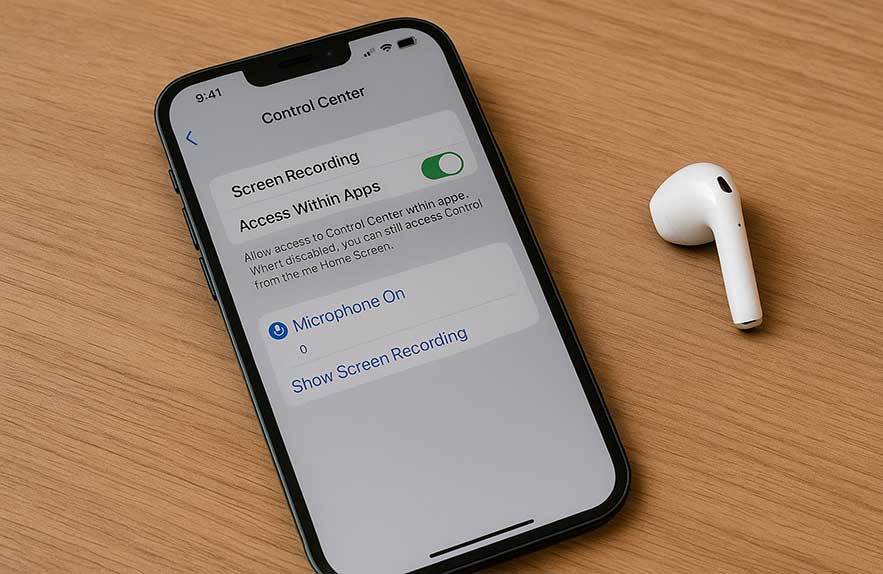
Before you can start recording your screen, you need to make sure the tool is actually available. Apple keeps the feature hidden by default — so the first step is to manually add it to your Control Center. If you’ve been wondering how to add screen record on iPhone, here’s exactly how to do it in iOS 17 and earlier versions.
Step 1: Open the Settings app on your iPhone.
Step 2: Scroll down and tap Control Center.
Step 3: Scroll through the list of “More Controls” and find Screen Recording.
Step 4: Tap the green + button next to it. You’ll now see Screen Recording appear in the “Included Controls” list — which means it’s been added to your Control Center.
Step 5: To test that it’s working, swipe down from the top right corner of your screen (on iPhones with Face ID) or swipe up from the bottom (on models with a Home button). You should now see a record-circle icon — that’s your new screen recording shortcut.
This step is only required once. After it’s added, you’ll always be able to launch screen recording in seconds, even while in other apps or games.
How to Screen Record on iPhone (Step-by-Step)
Once the screen recorder is added to your Control Center, you’re ready to use it. Here’s how to screen record on iPhone — whether you’re saving app tutorials, recording gameplay, or creating quick how-tos to send to friends or coworkers.
Step 1: Open the app or screen you want to record.
Step 2: Swipe to open the Control Center — either swipe down from the top right corner (Face ID models) or swipe up from the bottom (older models).
Step 3: Press the Screen Record icon (a circle inside another circle). A 3-second countdown will appear, and then recording begins automatically.
Step 4 (Optional): If you want to include voice or sound, press and hold the Screen Record button before starting, then tap the Microphone icon to turn it on. This is useful for voiceovers or live commentary.
Step 5: To stop recording, either tap the red time indicator at the top left of your screen and confirm, or open Control Center again and tap the Screen Record icon a second time.
Your recording is now saved automatically to the Photos app. From there, you can trim the video, mute sound, share it via Messages, or upload it to your favorite platform.
It’s really that simple. Once you know how do you screen record on iPhone, you can use it for walkthroughs, app demos, troubleshooting guides, and more.
Tips to Improve Your iPhone Screen Recordings
Now that you know how to screen record on iPhone, it’s worth taking a few extra steps to make your recordings cleaner and more professional — especially if you plan to share them online or include them in tutorials.
Clear distractions: Before recording, enable Do Not Disturb to avoid incoming notifications or calls showing up mid-recording. You can toggle it from the Control Center or set a custom Focus mode.
Tidy your screen: Consider removing background clutter, closing unnecessary apps, and cleaning up icons to keep your content focused. Small details make a big difference in how polished your screen recording feels.
Use a tripod or stand (for gestures): If you’re demonstrating physical taps or gestures on your iPhone screen for another camera, stabilize the phone and use good lighting. It’s especially helpful for tutorials filmed externally.
Edit the final result: Once your video is recorded, you can trim the beginning or end using the built-in editing tools in the Photos app. For more advanced editing — like adding transitions, titles, or music — check out our guide to the best video editing software available this year.
Need official troubleshooting? If screen recording isn’t showing up or isn’t working on your device, you can follow Apple’s official help page for step-by-step support: How to screen record on iPhone (Apple Support).
These small tweaks go a long way in making your videos feel more intentional and shareable — whether you’re uploading to YouTube, sending a walkthrough to a client, or just saving something for future reference.
Where to Find and Share Your iPhone Screen Recordings
After you finish recording, your video is automatically saved to the Photos app — no extra steps required. This makes it easy to find, edit, and share right from your iPhone, whether you’re uploading to social media or sending a quick how-to to a friend.
To locate your screen recordings:
- Open the Photos app
- Tap the Albums tab
- Scroll down and tap Screen Recordings under Media Types
You can also find your most recent screen recording right from the Recents album. From there, you can trim, mute audio, or add simple edits using the built-in video tools. For anything more advanced — like cutting out pauses or adding voiceovers — consider using a dedicated video editor.
Sharing your screen recording is just as easy. Tap the Share button, then choose from AirDrop, Messages, Mail, or apps like YouTube, Slack, or Google Drive. You can also save it directly to Files or copy a link if uploading through a third-party app.
Once you’ve learned how to screen record on iPhone, it quickly becomes second nature. Whether you’re showing someone how to use an app or recording gameplay for your channel, having the recording and sharing process down saves time and keeps your workflow smooth.
What You Can Do With iPhone Screen Recordings
Now that you know how to screen record on iPhone, the next step is making that skill part of your regular workflow. It’s not just a cool trick — it’s a useful tool for creating, teaching, sharing, and troubleshooting in ways that screenshots alone can’t match.
Recordings are great for showing how to use an app, demonstrating settings, or capturing bugs to show support teams. They’re also helpful for teachers, creators, and anyone building step-by-step content on social media or YouTube. If you create quick guides, screen demos, or product tutorials, this feature saves time and adds clarity.
Pairing your screen recordings with a good video editor opens up even more creative possibilities. You can turn a raw recording into a polished walkthrough — with text overlays, music, transitions, and more. That’s why we recommend bookmarking our guide to the best video editing software for iPhone and desktop editing alike.
Whether you’re helping someone fix their phone, recording app reviews, or explaining a process to your audience, mastering how to screen record on iPhone gives you a flexible tool that’s always just one swipe away.
And the best part? You don’t need any third-party apps. It’s already built into iOS — ready whenever you are.
Frequently Asked Questions (FAQ)
1. How do I enable screen recording on my iPhone?
Go to Settings > Control Center, then tap the green plus icon next to “Screen Recording.” Once added, you can access it anytime from the Control Center.
2. Where are my iPhone screen recordings saved?
All screen recordings are saved automatically to the Photos app. You can find them under the “Screen Recordings” media type or in your Recents album.
3. Can I screen record with audio on iPhone?
Yes! Just press and hold the screen record icon in Control Center and tap the Microphone button before starting. This lets you narrate as you record.
4. How do I screen record on iPhone without third-party apps?
You don’t need to download anything. The feature is built into iOS. Once you learn how to screen record on iPhone, you can do it anytime from Control Center — no extra software required.
5. Is screen recording available on all iPhone models?
Yes, screen recording is available on all iPhones running iOS 11 and newer. If you’re using an iPhone 15 or iOS 17, follow our guide to how to screen record on iPhone for the latest steps that work on all current models.
Now that you’ve learned how to screen record on iPhone, you’ve got a built-in tool that works for everything from tutorials to tech support. Just swipe, tap, and share — and you’re good to go.