Why Learn to Screen Record on Windows?
How to screen record on windows is one of the most common questions from Windows 11 users today. Whether you are creating tutorials, recording gameplay, preparing work presentations, or helping friends by showing exactly what is happening on your computer, knowing how to screen record on windows makes life easier. This helpful skill brings new ways to communicate, teach, and troubleshoot without needing any advanced tech experience.
Screen recording is now a must-have tool for people at all skill levels. Teachers use it to demonstrate assignments or provide feedback, and students use it for recording lessons or walkthroughs on projects. Gamers depend on screen capture for sharing gameplay highlights or streaming to friends. In the workplace, professionals use screen recordings for everything from tech support and remote training to making step-by-step guides or explaining complicated workflows to coworkers. Even everyday users find it much easier to capture a process or show an error with a quick screen recording than to write a long email or chat message.
The great news is that Windows 11 includes everything you need to get started, right out of the box. There’s no reason to buy extra software or download unknown apps when you want to screen record. Microsoft invested in user-friendly recording tools, letting you start capturing video from almost any app or game by just pressing a simple key combination. You can record instructions, keep a record of important meetings, or save family video calls, all using built-in features.
Knowing how to screen record on windows also helps you get more out of your computer. You will be able to review complex instructions as often as you like, store helpful clips for future use, or even build a library of guides for yourself and others. This comes in handy not just at work or school but whenever a family member or friend asks for step-by-step help with software or settings—send a video, and problem solving becomes much easier.
Even if you have never tried screen recording on a PC before, Windows 11 makes it simple. In the rest of this article, you will get step-by-step guidance on recording individual program windows, your full desktop, or creating quick demos for any project. You do not need any prior experience—with just a few clicks, you will have high-quality recordings ready for sharing or saving for later.
Table of Contents
- Why Learn to Screen Record on Windows?
- Using the Xbox Game Bar to Record Your Screen
- Recording the Entire Screen: Using Microsoft Clipchamp
- Other Built-In Windows Options for Screen Capture
- Recommended Third-Party Free Tools (Optional)
- Final Tips for Better Screen Recordings
Using the Xbox Game Bar to Record Your Screen
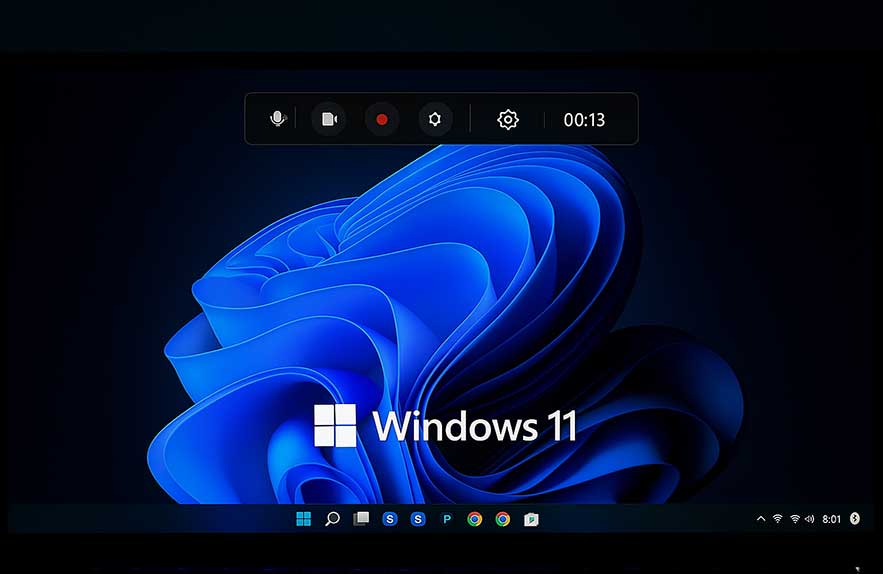
If you are searching for how to record screen on windows, the Xbox Game Bar built into Windows 11 is the easiest place to begin. The Game Bar is designed to help users capture video clips, screenshots, and even audio straight from their favorite apps and games—no extra downloads or purchases required. Even for everyday users and beginners, it takes only a minute to set up and record your first screen video.
To launch the Game Bar, simply press the
Windows key + Gon your keyboard. This opens an overlay at the top of your screen, where you will see several widgets. Click on the “Capture” widget. If you cannot find it, look for the small camera icon on the toolbar or press
Windows key + Alt + Rto start and stop recording instantly.
When you are ready to screen record, make sure the window or app you want to capture is highlighted. The Game Bar works best for recording app windows, game screens, and most modern programs. Click the round “Start Recording” button in the Capture window. You will see a small bar in the corner that shows a timer and gives you simple controls for pausing or stopping your recording. Click the “Stop Recording” button when finished, or use the keyboard shortcut again.
Your captured video is saved automatically. To find your recordings, go to the “Videos” folder in File Explorer and open the “Captures” subfolder. This is a handy trick to remember, as it keeps all your videos organized and easy to find right after recording. Windows 11 saves high-quality MP4 files by default, making your recordings simple to share by email, upload, or edit further.
For those wondering how to record screen on windows systems that are not gaming PCs, the good news is that the Xbox Game Bar works across most laptops and desktops. It is built for both gamers and general users. If the Game Bar does not start, check the Windows settings to enable Game Bar and make sure your graphics drivers are up to date. Even if you only want to show a software bug or record a quick demo for class, this tool is ideal for fast, shareable screen recordings.
This method covers most basic recording needs on Windows 11. Next, you will learn how to capture your entire screen or browser tabs using Microsoft Clipchamp, another built-in tool for more recording flexibility.
Recording the Entire Screen: Using Microsoft Clipchamp
Many people want to learn how to record screen on windows 11, especially when they need to show the full desktop, a browser tab, or work across multiple programs. Microsoft Clipchamp, included for free in Windows 11, is a straightforward tool built for exactly this purpose. Clipchamp lets you record your entire screen, an individual app, or even just a browser tab. Plus, it adds basic video editing features to trim your clips or combine recordings before sharing.
To get started, open your Start menu and search for “Clipchamp.” Launch the app, and after a quick setup, you will find yourself on the main dashboard. Click on “Create a new video,” which opens a workspace for your project. To begin your recording, select “Record & Create” at the left side of the screen and then choose “Screen recording.” Clipchamp will prompt you to pick what you want to capture—your entire display, a specific application window, or an active browser tab. This flexibility is helpful for teachers, students, or anyone making software walk-throughs or video-based instructions.
After picking what to record, click “Share” and then “Start Recording.” If your computer has a microphone or webcam, Clipchamp can capture those along with your screen, making it a solid choice for tutorials or narrated guides. When you finish, stop the recording, and your clip will appear in the project timeline. Here you can trim the ends, cut out mistakes, or add extra instructions if you want a finished, shareable video. For many users, this is the easiest way to make a polished screen capture for YouTube, social media, or internal training at work.
If you are looking for how to record screen on windows 11 without outside software, Clipchamp is a smooth solution. Videos are saved automatically inside the app and can also be exported as MP4s to your Videos folder or another location. The drag-and-drop editor helps keep things simple, and you do not need a technical background to make your first recording in minutes. This is especially helpful for users upgrading from Windows 10, where these recording and editing features were less complete or not built-in.
Clipchamp also solves the classic problem of wanting to record beyond just one app window—the Xbox Game Bar often limits you to a single program. With how to record screen on windows 11 using Clipchamp, you can show task switching, desktop activity, and anything else on display. Next, we will look at other built-in options for quick screen captures in both Windows 10 and 11, helping you match the tool to your personal workflow.
Other Built-In Windows Options for Screen Capture
While many users start with the Game Bar or Clipchamp, knowing all built-in screen capture solutions is useful if you want more flexibility or if your needs are a little different. The windows 10 screen recorder options and newer recording tools in Windows 11 give you several ways to create videos for tutorials, training, or saving important steps. Choosing the right method depends on your Windows version and whether you want to record a window, a region, or the entire desktop.
Let’s start with Windows 11. With the 22H2 update, Windows added a recording feature to the classic Snipping Tool. While Snipping Tool was first known for screenshots, it now allows you to record video clips of a selected area on your screen. If you are using Windows 11, search for “Snipping Tool” and launch it. Instead of only taking a screenshot, click the camera icon next to “New” to use the recording option.
Choose the area of the screen you want to capture, then hit the “Record” button. When you are done, save the video as an MP4. If you only need to capture part of your display, this approach is often even faster than using how to record screen on windows 11 methods like Game Bar or Clipchamp.
For those using Windows 10, the built-in windows 10 screen recorder capability is still the Xbox Game Bar. If you search for how to screen record on windows on a Windows 10 PC, this is the official option. Press
Windows key + Gto open the overlay, then use the Capture widget to start recording your gameplay, app, or any active window. Videos are stored under your Videos > Captures folder for easy access later. While this method does not cover full desktop or File Explorer by default, it performs well for capturing games and most software tools.
People often wonder how to screen record on windows 11 for something more advanced. Sometimes, it just means knowing which tool opens fastest from the Start menu or how to use keyboard shortcuts like
Windows key + Alt + Rfor rapid video recording. If you are helping someone who asks how to record screen on windows, or want to pass along quick help to a colleague, teaching them these built-in tools is often the most effective first step and avoids installing outside apps.
One last tip: while Windows screen recorders work well for basics, you can supplement built-in options by learning how to see computer specs windows 11 style—that way you know if your system can handle recording complex videos without lag. Keeping your machine updated and checking for graphics driver updates also helps, giving your captures better performance and smoother video.
Each method for screen recording in Windows has trade-offs. Using both Windows 10 screen recorder and enhanced Windows 11 screen features lets you find the best fit for simple captures, app demos, or short tutorials. Next, we’ll cover advanced free recording apps available for users who need more control than built-in tools provide.
Recommended Third-Party Free Tools (Optional)
If you have tried all the built-in options and want more features, learning how to screen record on windows with third-party free tools is the next step. These programs are perfect for users who need advanced controls, want to record long sessions, or hope to capture more than just one window or app. While Windows 11 makes it simple to create basic recordings, power users often reach for extra features that free external programs provide.
OBS Studio is one of the most popular choices for serious screen recording on Windows. OBS lets you record the whole screen, any single app, a specific region, or even multiple audio sources at once. With flexible settings, filters, and support for recording at high frame rates, it is ideal for gamers, YouTubers, and teachers who want top-quality video. Many live streamers use OBS not only for recording but for real-time streaming to YouTube or Twitch. The interface can seem complex at first, but once you learn the basics, it opens up a world of creative options.
ShareX is another favorite free tool for screen capture and recording on Windows. It is lightweight, open source, and does not require registration or login. ShareX offers many capture options, from full screen to fixed regions, scrolling captures for long documents, and automatic uploading to cloud storage. If you want to automate screenshots, make quick GIFs, or record step-by-step workflows, ShareX gives you lots of customization. It may not have the same video editing power as some paid tools, but for recording and sharing quick clips, it is a solid pick.
There are other options to explore, like FlashBack Express and Free Cam, but most users find how to record screen on windows is easy to master with either OBS Studio or ShareX. Both are supported by active communities, with lots of tutorials and troubleshooting guides available online. The trade-off for using third-party apps is a steeper learning curve, but the payoff is more control over formats, quality settings, audio sources, and editing straight after recording.
Remember, built-in Windows tools meet the needs of most users, and you should always stick to reputable websites when downloading third-party software. For updated reviews and download links, you can check PCMag’s best free screen recorders roundup for the latest safe choices and easy-to-follow guides.
Next, let’s wrap up with final tips to get the best results every time you record your screen, whether using Windows defaults or advanced free apps.
Final Tips for Better Screen Recordings
After learning how to screen record on windows using all the built-in and optional tools, it helps to remember some small extra steps to make every capture smoother. Whether you use the windows 10 screen recorder, the Game Bar on Windows 11, or a third-party app, a few good habits make your recordings clearer and your workflow less stressful.
The first tip is to close any apps you do not need. Before you hit record, shut down unused programs and browser tabs. This frees up memory and keeps your computer focused on just what you want to capture. You will notice better audio and video quality, especially if you are using how to record screen on windows 11 with Clipchamp or another app that can grab your voice and webcam at the same time.
Next, find a quiet space if you are recording with a microphone. This is relevant for all tools, whether you rely on how to screen record on windows 11, snipping tool’s recording feature, or third-party options like OBS or ShareX. Small noises can be distracting in tutorials and presentations, so doing a brief test to check sound quality is wise. Position your mic away from your keyboard to avoid picking up typing, and consider muting yourself when recording just a video walkthrough without voice-over.
Another detail to remember when using how to record screen on windows is checking your save location in advance. Windows typically puts all screen recordings in your Videos folder, inside the Captures subfolder, whether you use Game Bar, windows 10 screen recorder, or Clipchamp. If you upgrade to third-party tools, always look through settings to ensure your recordings are saved where you expect them—no one likes hunting for lost videos.
Before a major project or long session, run a short test recording. This way, you can confirm your chosen software (such as how to record screen on windows 11) is set to the right microphone and quality level. Doing a test also helps catch little things like notifications popping up during a recording, which can be avoided by using Focus Assist or Do Not Disturb mode in Windows settings.
Lastly, be mindful of what is on your desktop or browser windows. When you screen record on windows or share clips with others, double-check that any private files or personal tabs are minimized or hidden. This is especially important for people using how to screen record on windows for work or school presentations.
Learning how to screen record on windows, how to record screen on windows 11, or even using the older windows 10 screen recorder helps make your computer more useful, whether for sharing, troubleshooting, or learning something new. The tools are built in, easy to use, and with practice, you will quickly master high-quality recordings for all your projects. Take a moment to get familiar with each method, and you will be ready whenever you need to capture your screen with confidence.