Introduction
If you need to convert PNG to vector because you bought a logo online and only received a flat image, you’re not alone. It might look fine, but without editable source files like SVG, AI, or EPS, it’s basically locked. That becomes a problem when you want to resize the logo, tweak the colors, or create a version for your browser tab.
I didn’t want to pay again for something I already owned, so I decided to fix the PNG logo myself. In this article, I’ll show you exactly how I used Adobe Illustrator to convert my flat image into a vector, make it scalable, and even turn it into a custom favicon. No advanced design skills needed — just some time, a few steps, and the right tools.
Table of Contents
- Introduction
- Why You Might Need to Fix a PNG Logo
- Step 1: Open Your PNG Logo in Adobe Illustrator
- Step 2: Use “Image Trace” to Convert PNG to Vector
- Step 3: Clean Up the Logo Paths
- Step 4: Save the Logo in Multiple Formats
- Step 5: Create a Logo Icon for Your Site
- Bonus: Color Tweaks and Layout Variants
- Why It’s Worth Learning to Fix a PNG Logo
- Final Tip
- Wrapping Up
Why You Might Need to Fix a PNG Logo
A PNG file might seem like enough when you first receive your logo. But as soon as you need to use it in different places — like your blog header, YouTube banner, business cards, or browser tab — the limitations become obvious.
- It’s not scalable without losing quality
- You can’t change the colors or layout
- You can’t create an icon-sized version without it getting blurry
For me, the breaking point came when I tried to resize my logo for different blog sections and favicons. That’s when I realized I needed to convert the PNG to a vector.
Step 1: Open Your PNG Logo in Adobe Illustrator
First, launch Adobe Illustrator and open your PNG file.
- Go to File > Open and select your PNG image
- You’ll see it appear on the canvas as a locked, flat image
At this stage, your PNG is still just a basic image — you can’t break it into editable parts yet. But you’re one step away from unlocking it.
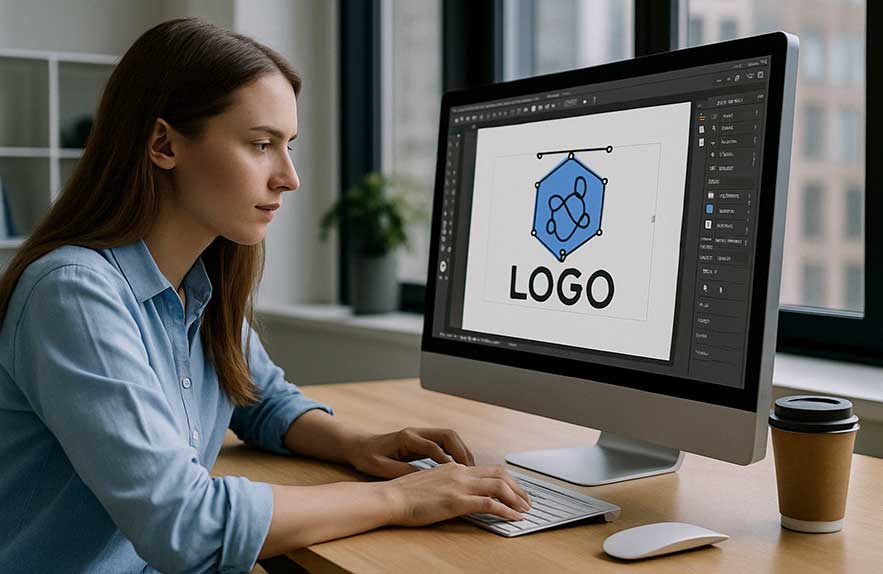
Step 2: Use “Image Trace” to Convert PNG to Vector
To fix your PNG logo and make it editable, we’ll convert it to a vector using Image Trace.
- Select the image by clicking on it
- In the top toolbar, click Window > Image Trace to open the panel
- Choose Black and White Logo (if it’s a single color), or High Fidelity Photo for more detail
- Check Preview to see how it looks
- When satisfied, click Expand in the top toolbar
This process turns your PNG into vector paths. Now each part of your logo can be edited, resized, or isolated.
Note: Depending on the quality of the original image, you might need to tweak the Image Trace settings a bit for the cleanest result.
Step 3: Clean Up the Logo Paths
Once you’ve expanded your image, Illustrator will turn the graphic into many small shapes.
- Use the Direct Selection Tool (A) to select and delete any background shapes or unwanted pieces
- Group the logo (Object > Group) if you want to move or resize it as a single unit
- If you notice messy edges, zoom in and manually adjust anchor points
This is the stage where your logo starts to feel like a proper asset. You’ve now moved beyond a locked PNG file.
Step 4: Save the Logo in Multiple Formats
To make sure your new vector logo is future-proof, save it in various formats.
- AI (Adobe Illustrator): Editable version for designers
- SVG: Web-friendly and scalable
- EPS or PDF: For printing
- PNG: For social media, transparent backgrounds, or previews
Go to File > Export > Export As and select your desired format. This way, you’re no longer stuck with just one image that doesn’t fit your needs.
Step 5: Create a Logo Icon for Your Site
Now that your logo is editable, let’s create a smaller version for your favicon or mobile icon.
- Zoom into the part of the logo that works well as a standalone icon
- Copy it to a new artboard
- Resize it to 512×512 px (standard favicon size)
- Simplify or adjust colors if needed
- Export as PNG and SVG
This tiny icon will now look sharp in your browser tab or when saved on mobile home screens — all from your original logo.
Bonus: Color Tweaks and Layout Variants
Since you’re already in Illustrator, it’s a good time to create variations:
- One with a white background, one transparent
- Dark mode vs light mode versions
- Horizontal vs vertical layout
- Grayscale or one-color variant
These variations are perfect for different blog templates, product packaging, or affiliate banners.
Why It’s Worth Learning to Fix a PNG Logo
Fixing your PNG logo might sound like a lot of work, but here’s what you get:
- Total control over your brand’s look
- No need to rehire designers for basic edits
- A professional setup with icons, vectors, and multiple layouts
Instead of tossing your PNG in frustration or paying again for what should have been included, you’ll know exactly how to convert PNG to vector and make it work anywhere.
Final Tip
If your logo was created using a common font, you might also need to install or license that font if you plan to edit the text. Otherwise, you can outline the text (Type > Create Outlines) to keep it intact without needing the font installed. If you haven’t read the story behind how I ended up with just a PNG logo, check out my first article about buying a $25 logo online
Wrapping Up
Converting a PNG logo to a vector using Adobe Illustrator gives you freedom. You can fix resolution issues, make edits, and create new versions — all without starting from scratch. Whether you need a clean favicon, a high-res blog banner, or an editable file for print, the solution is now in your hands. For more information on how Illustrator handles vector paths, you can also check Adobe’s official Illustrator documentation.